
Alternator Rebuilding
If you wish to watch a good video on rebuilding the CS 144, here are a couple of links to YouTube posted by Alternatorparts.com . Note he is working on the second generation CS 144 which makes an excellent replacement for ours if you get the 140 amp version. It is comparably priced to ours and is stronger and better. This was available on the '94-'96 Impalas as well as others. See my page on alternator selection for numbers and more info.
http://www.youtube.com/watch?v=LdFA6WF8lVg
http://www.youtube.com/watch?v=rlvR9MjlQkE
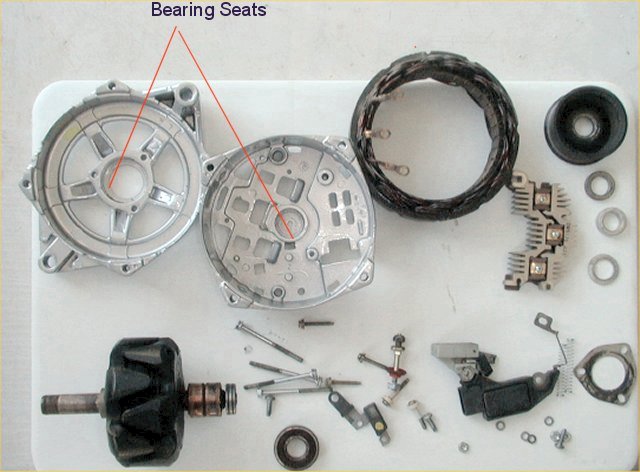
Be sure you mark the case halves so that the clocking is right when you reassemble. I used a drill to make a shallow dimple on the inside faces of adjoining ears.
If you are going to powder coat your alternator case, be sure that you tell the coater not to coat the bearing seats in each housing seat. If he coats them, the bearings will not go into place. I wonder how I learned this?
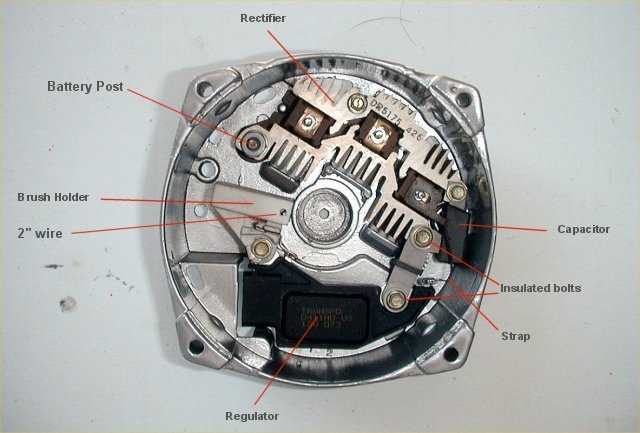
Be careful when slipping the female terminal on the brush assembly over the male terminal of the diode pack and don't break it off.
Insert a straight piece of wire about 2" long thru the hole in the brush holder, thru the hole in the brushes (after recessing the brushes back into the holder) and out the hole in the back of the case. When the alternator is assembled and the case shells bolted together, the wire may be pulled out the back of the case so the brushes may press against the armature.
Note the location of the two insulated screws.
Also, the strap that is soldered to the end of the regulator must be removed and soldered to the end of the new regulator. The other end goes over the end of the right most stator post.
I am using a 200 amp upgrade kit in this rebuild. It consists of new brushes, new regulator, new rear bearing, and a new stator. This is overkill as a 140 amp unit is more than enough,.