
AC Control Head Vacuum Switch
At one time, or another, you may encounter a situation when the upper lever on your HVAC control head will not operate correctly and allow you to select the mode of operation you wish. When this occurs, the problem is often caused by the vacuum switch which is mounted on the rear of the head. The plastic pin that holds it together breaks, the halves separate, and, the lever may jam.
DO YOURSELF A FAVOR BEFORE YOU START TEARING INTO IT. CHECK THE TWO HARD PLASTIC LINES UNDER HOOD. ONE RUNS TO THE HEATER CONTROL VALVE AND THE OTHER GOES INTO THE PASSENGER COMPARTMENT TO THE VACUUM LINES. BE SURE THEY ARE NOT BROKEN AND THAT THE ONE THT GOES TO THE BOTTOM OF THE HEATER WATER CONTROL IS CONNECTED TO IT.
The part number for this switch is GM# 16037778 or AC Delco 15-71389.
In order to replace it, Remove the trim panel that covers the Control Head and Radio. Then remove the four screws that hold the control head to the dash. You should be able to pull it out slightly as shown in the next picture.
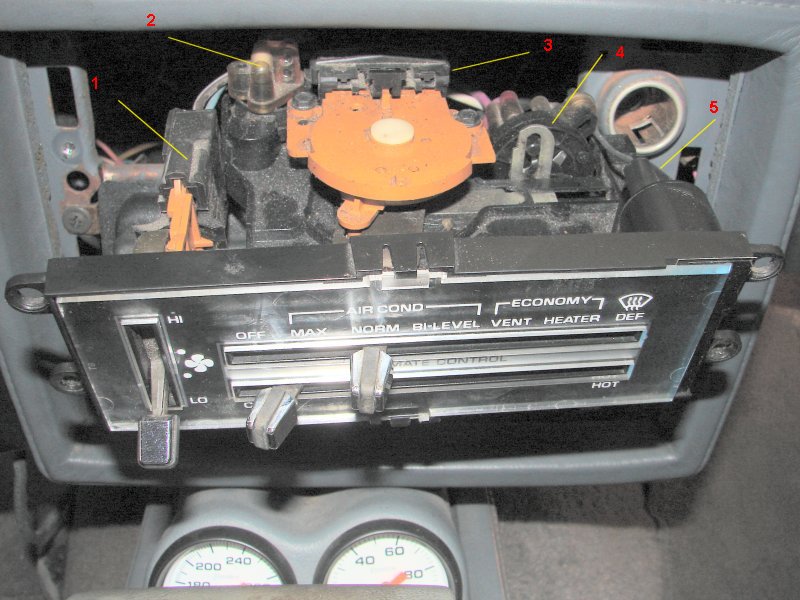
Remove the blower switch connector (1)
Remove the small vacuum connector (2)
Remove the electrical connector (3)
Remove the dash light connector (5) (Good time to put a new bulb in)
Note that the vacuum switch is numbered (4) in the above picture.
Now, the control head will still not move any further due to the lower heat level lever cable which is attached to the bottom of the control in the rear. To remove this cable, turn the control so that you can see the cable and the tinnerman nut that holds the inner cable end to the plastic pin on the control lever. I use a small pair of needlenose pliers to wiggle the tinnerman nut off.
I did not take a picture of the bottom of the head with the cable attached, but, it is obvious when you look at it. Now, having disconnected the inner cable, you must disconnect the outer cable.
Look at the next picture for the cable retaining clip which is accessed from the top.
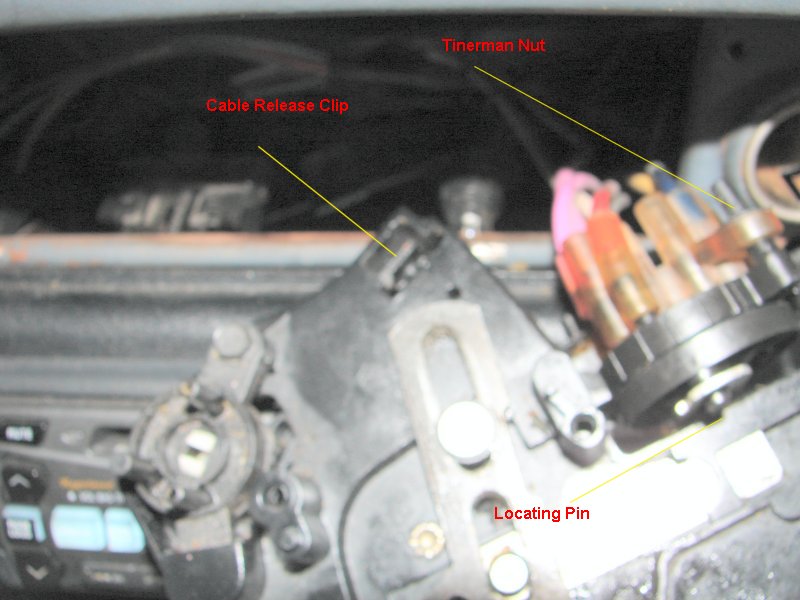
The picture is a bit blurry, but, there is a latch clip that must be pushed toward the rear with a small screwdriver so that the cable retaining clip can pop out the bottom of the control head. (Note that I removed the big round orange switch to take the picture. You don't have to) Now the control head will come out further making it easier to access the switch.
While looking at the above picture, note that the vacuum line bundle connector is held on to the back of the vacuum switch by two more frickin' tinnerman nuts...one of which is visible in the picture.
Also note the locating pin on the switch that must go thru the slot of the end of the upper selector arm so it will rotate the switch as you move the upper lever.
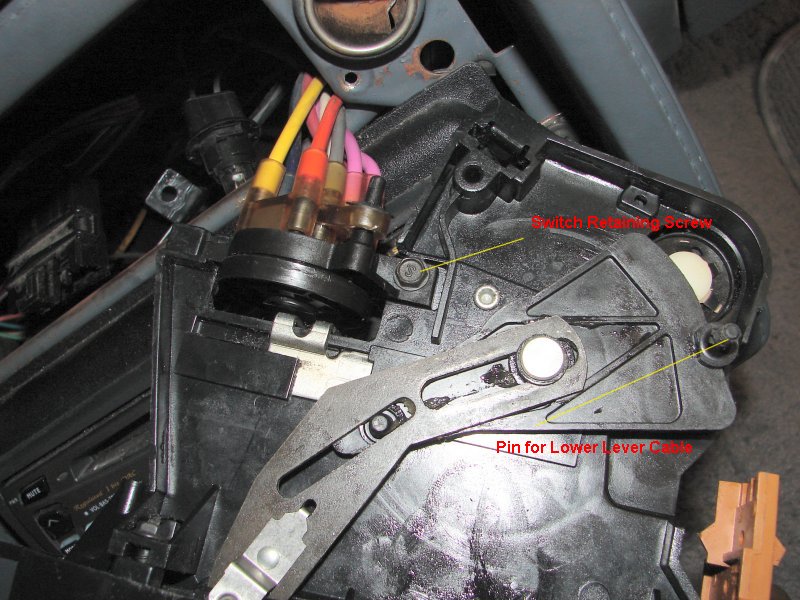
Okay, above is the bottom of the control head. The cable has already been removed. Remove the switch retaining screw so the vacuum switch can be removed. I did not label it, but, the other tinnerman nut that retains the vacuum connector is located on the plastic pin between the two pink vacuum harness in the picture.
Also note the pin for the lower lever cable inner end.
Take the switch off, after removing the two tinnerman nuts that hold the vacuum harness and install the new one. Be careful to put the locating pin back into the slot on the control lever slide and get the switch located properly in the head. Reverse the rest of the procedure.
Be sure to put the small vacuum connector back on that was labeled #2 in the first picture, or, it won't work when you are finished.
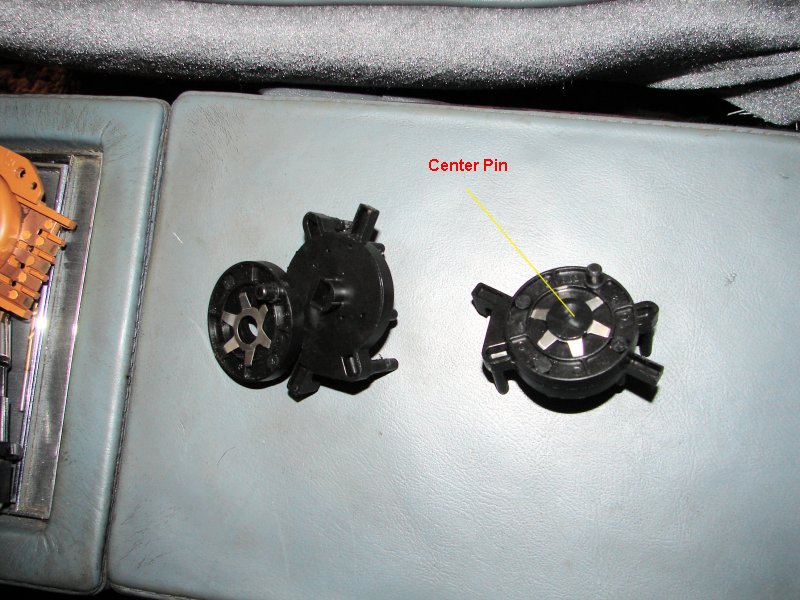
Below is a picture of the old switch and the new one. Note how the old one has separated into two pieces due to the plastic pin that went thru the center having broken.
This not too bad a job if you have two good eyes and someone to hold a light for you. I did not.