'73 Challenger
A few years ago, one of my friends calls me about an old Challenger that is sitting at the local Chevy dealer. A lady had it hauled in and wanted it fixed after her nephew had driven it thru a barbed wire fence. She claimed she had bought it as a restored TA clone. The dealer found some rust in the frame and told her the car was unsafe to drive in his opinion. He was probably more right than he realized.
My friend suggested I buy it, he would work on it, and we would resell it for a profit. I did and we hauled it to his shop nearby. After a couple of years of nothing going on, he called me and said I should take it home as he was busy building a house, and he did not know when we could get started on it.
I then discovered that rats had gotten into the car and did a number on the wiring and interior. So it began.
I spent several weeks patching the wiring. This led me to discover that the ammeter had burned up during some prior life and burned/melted the wiring harness behind the dash long before the rats finished it off. Some one had twisted some wires together so it would run, but, little else worked. Then the rats ate thru what was left. Eventually, I got things working but, almost ever step of the way led to some new discovery-none of them good.
I rebuilt the ignition system using an HEI system instead of the Mopar box, changed the intake, rewired under the hood to bypass the ammeter, replaced the brakes, and started on the suspension last fall installing mostly Hotchkis pieces along with Moog tie rods, etc.
As I worked on it, I became more and more suspicious of some of the frame repair in the front of the car as things seemed extremely flexible.
Here are some pictures taken along the way.
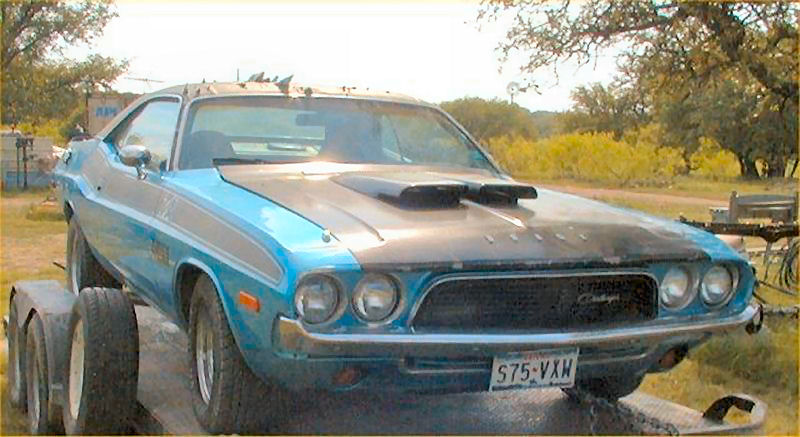
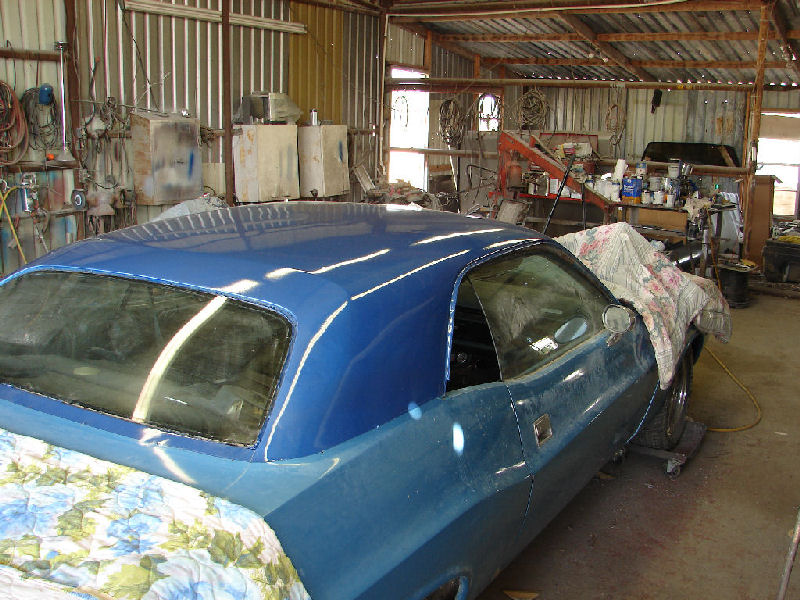
You can see the number the fence did on top of the hood, around the head light, and hood front. Not visible here is the bent up trim around the windshield and side glass. Also not visible is the hole that the wire knocked into the roof just behind the windshield. Or, the fact that the entire front edge of the roof is bondo.
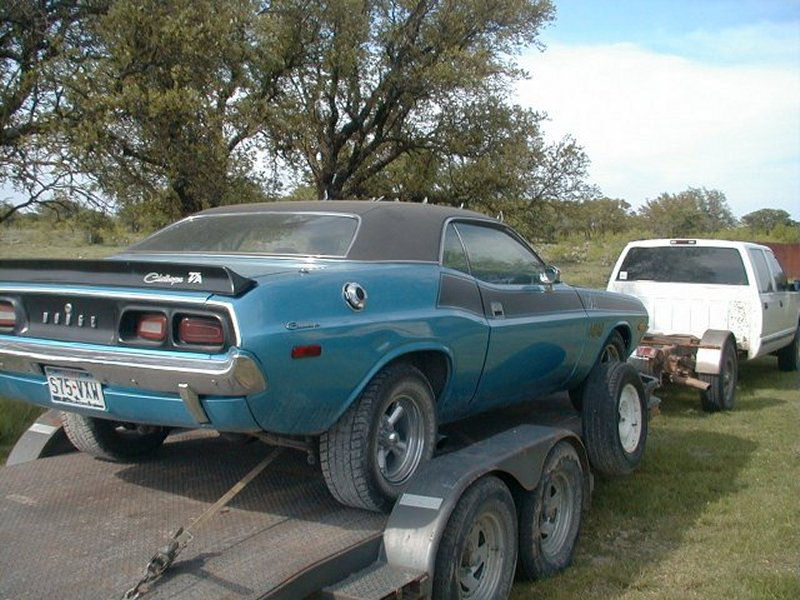
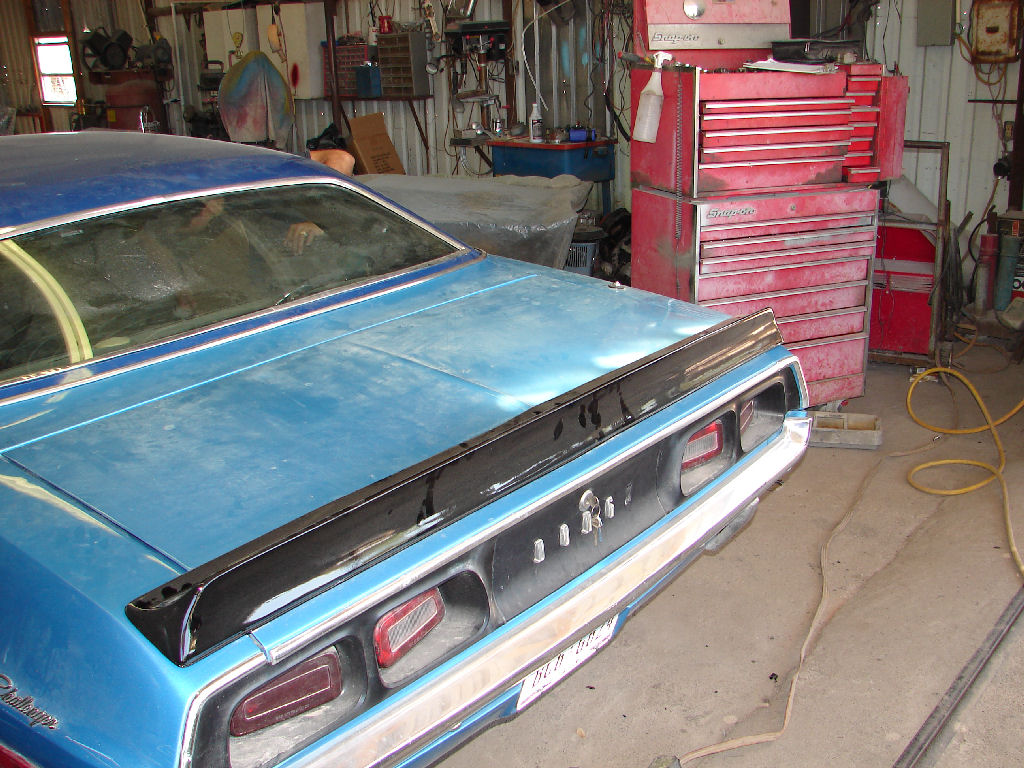
Here on the rear, we can see the standard air shock jack up. I see the E is still on Dodge on the tail panel so I guess that got lost somewhere between there and here.
Besides the frame repairs looking suspicious, I wanted to weld up a crack in the passenger inner fender as the inner fender is a key structural piece. We found that the crack was a crack in the bondo that covered a square foot rusted out area and there was nothing to weld. New inner fender coming up!
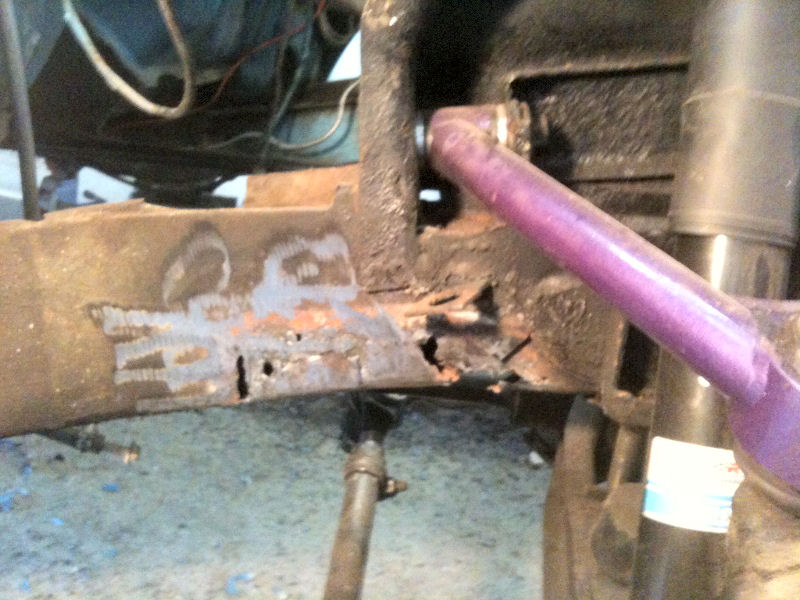
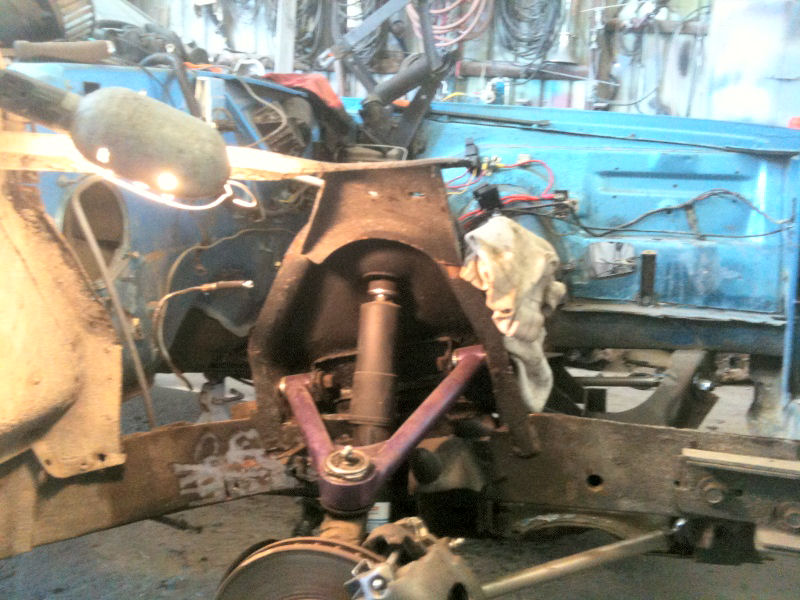
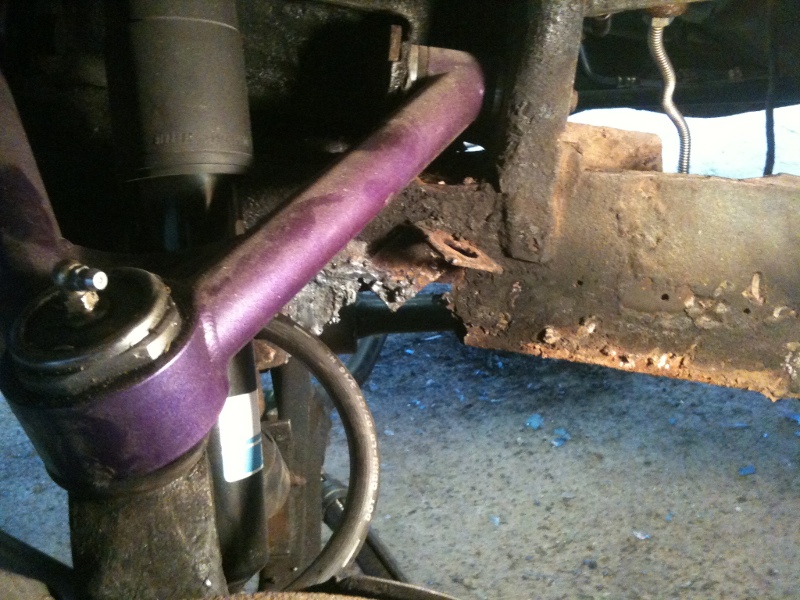
This was what was under the angle iron patch that covered the frame rail. Nice and rusty. Also, the welded in nut that holds the K Frame rail in the front was rusted out.
This is what we found when we cut off the angle iron patch on the driver's side...I guess it was only a matter of time before the engine and tranny fell out on the road when I hit a bump?
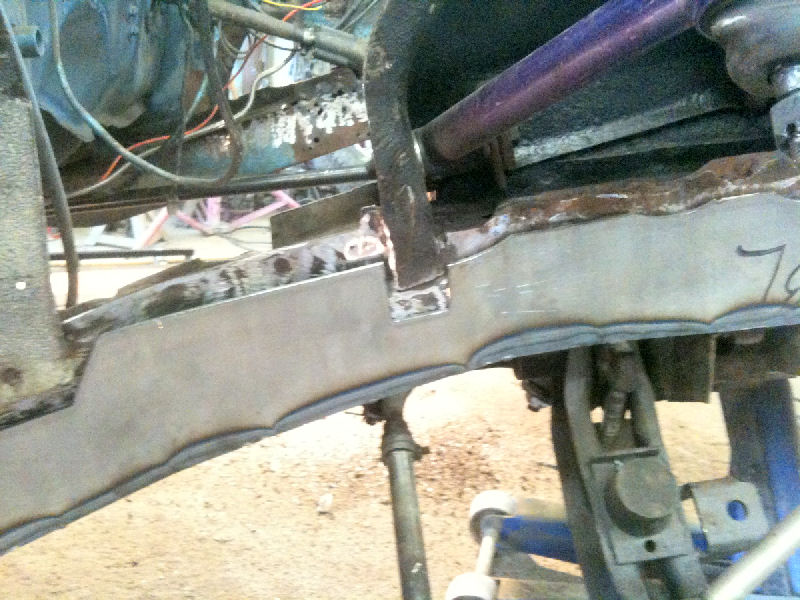
So, we installed frame rail caps on both sides. Caps run from the cross member under the car to the radiator supports. These are the same gauge as the original frame rails.
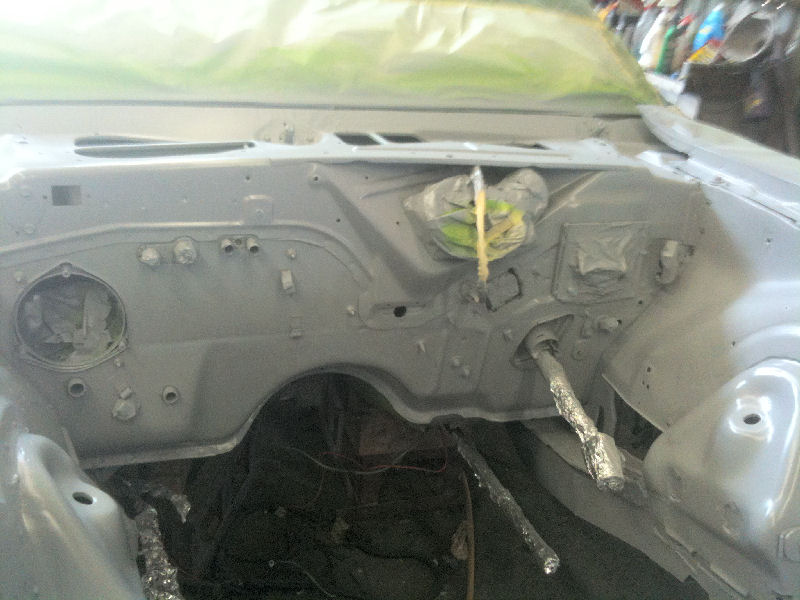
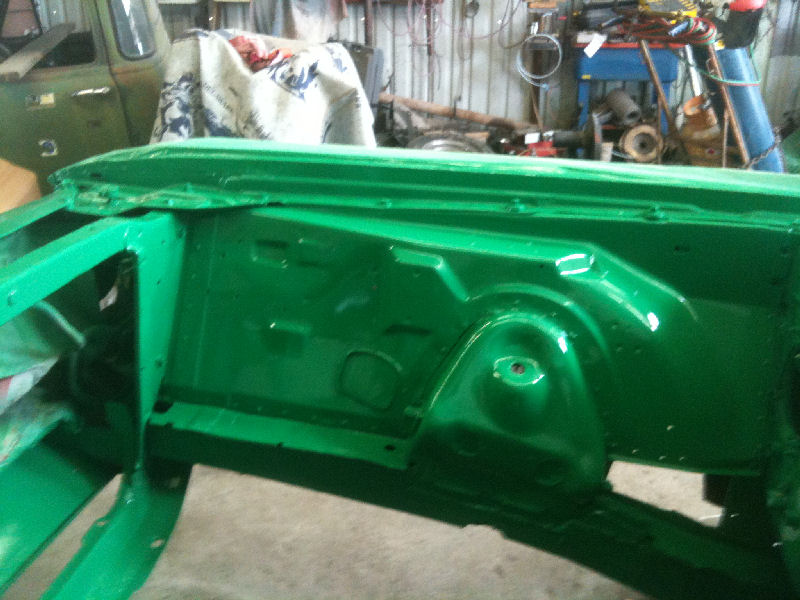
above shows the inner fender and frame rail repair after painting. We intend to paint the car the color of Bobby Labonte's old #18 Nascar car. Interstate Green. Sean gave me the paint codes, but, no one around here carries the brands of paints he found so I guessed. First guess was too yellow so I picked one about five shades greener...went too far and it has too much blue in it. The picture below is the same paint but this picture came out too blue...it's probably in between the two pictures in reality. Not Interstate Green no matter how you cut it. Oh, well.
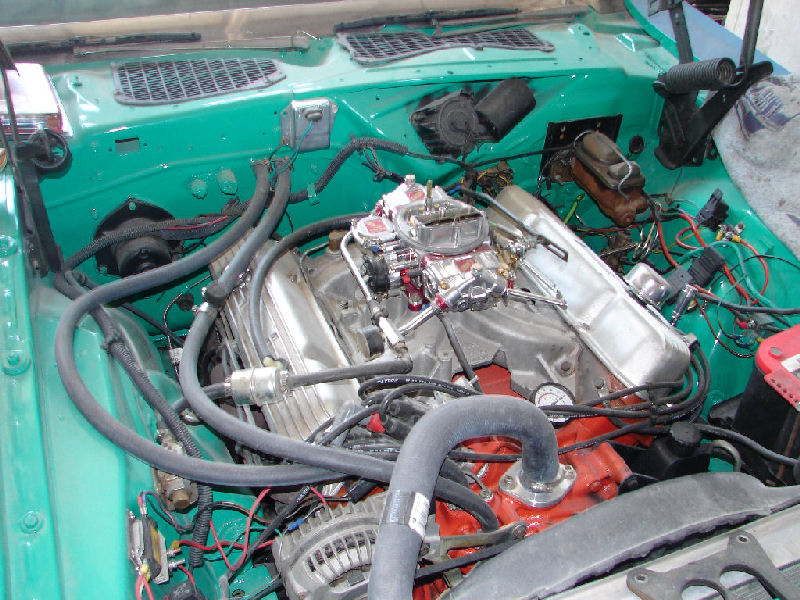
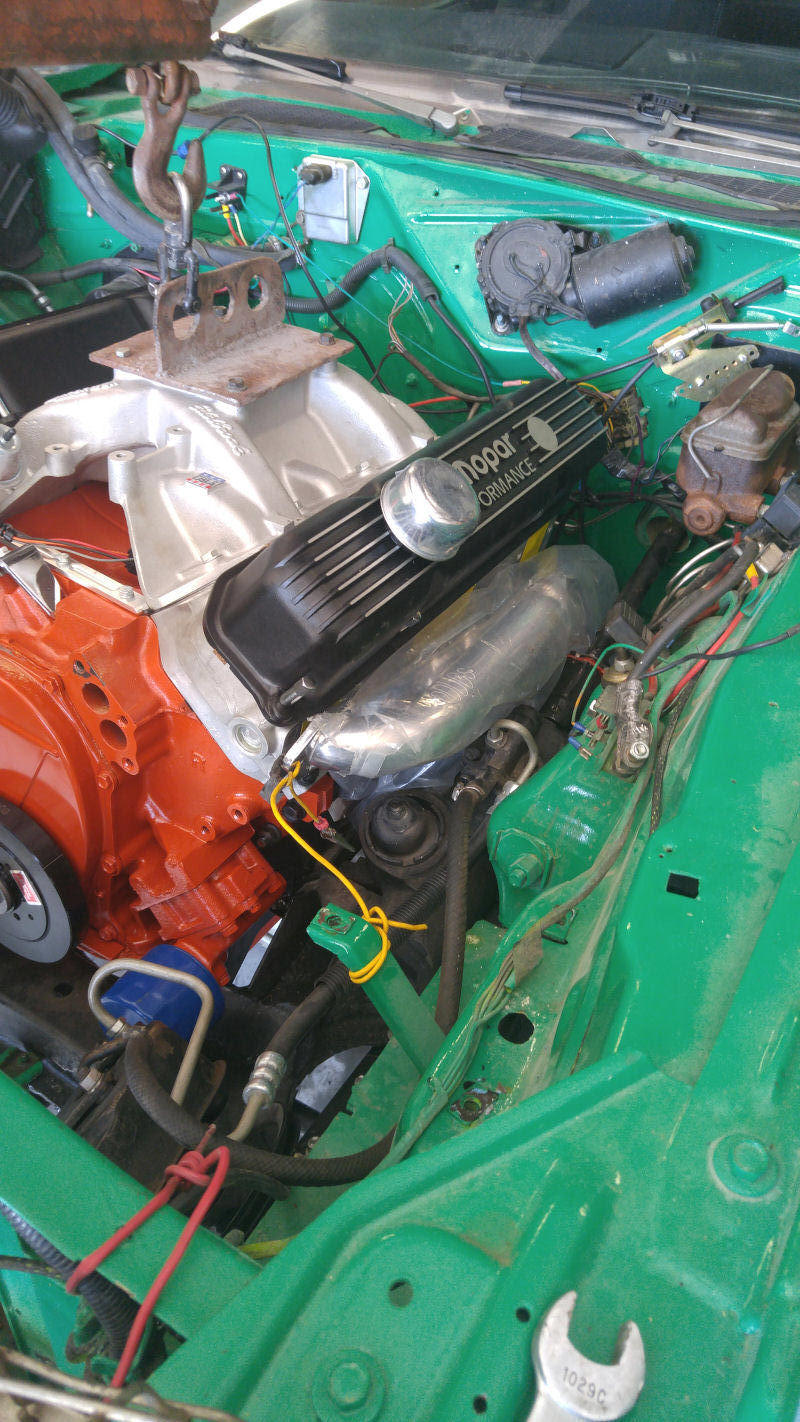
When I had the engine out, I replaced the Mopar performance cam with a Lunati Voodoo cam and added a Cloyes double roller to replace the worn out chain that was in it. I had never been able to get the intake to seal properly and figured the heads had been milled too much for it to fit. I checked the preload on the pushrods and it was around 0.120" which is about 4 times what I would like so I figured the heads had been cut about .060". I cut the intake 0.045" so it would sit down and allow it to seal properly. I shimmed the rocker arm shafts .060" to try to get the preload more reasonable. I thought it might be holding the valves open a little which would account for some strange behavior. Also, the oil pan was touching the cross link slightly, so I found a better fitting pan (402 on the new pan) on Ebay. On top, I added a Quick Flow carb. Then a PTC 2500 stall converter fixed the too tight converter problem I had. You can see the GM HEI module on the passenger fender that fires a Crane coil back to the Mopar distributor.
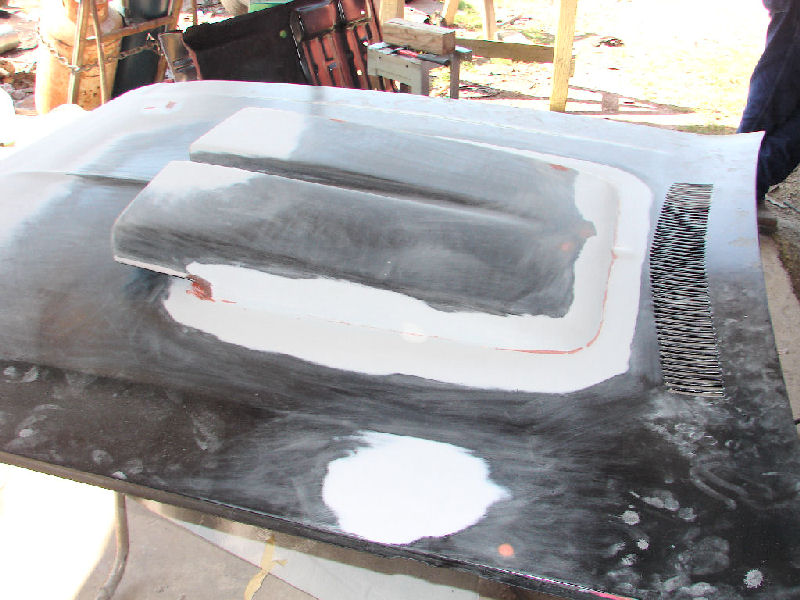
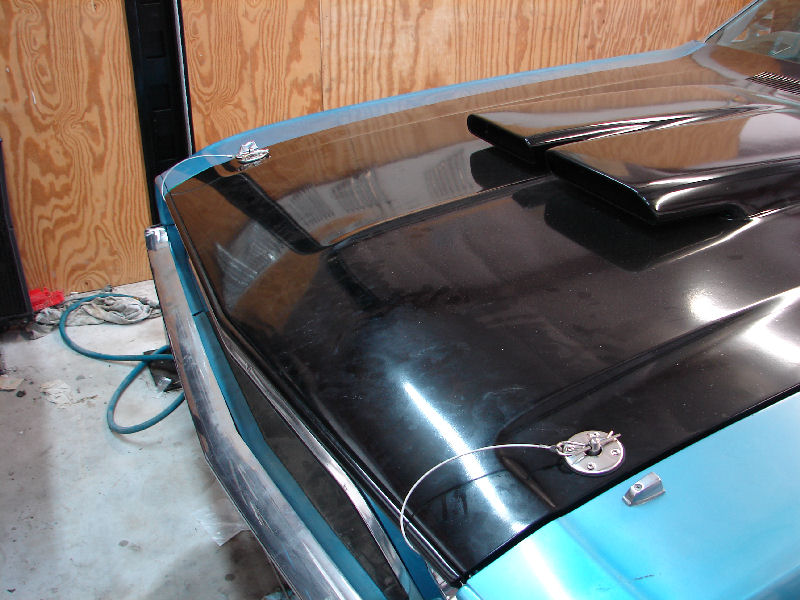
Altho I want to ultimately install a fiberglass TA hood on it, I decided to mold in the aftermarket scoop and paint the hood satin black. I spent about a million bucks on paint trying to get it to come out satin, but, I would say this is more semi gloss, but, I gave up. Added some hood pins in the picture below. It's a muscle car, after all.

Above is passenger side floor pan after the bits and pieces that had been riveted in as patches and then smothered under a quarter inch of undercoating were cut out. Had to cut the rear floor pan out on this side as well.
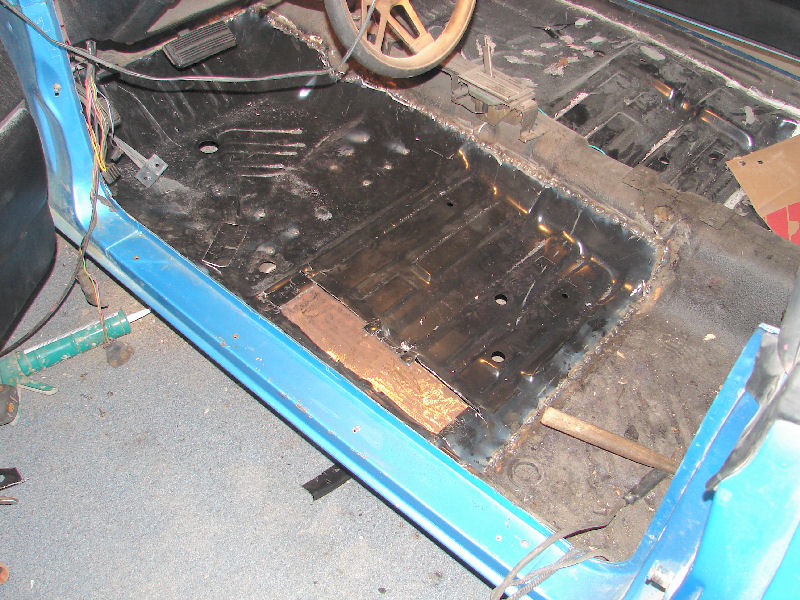
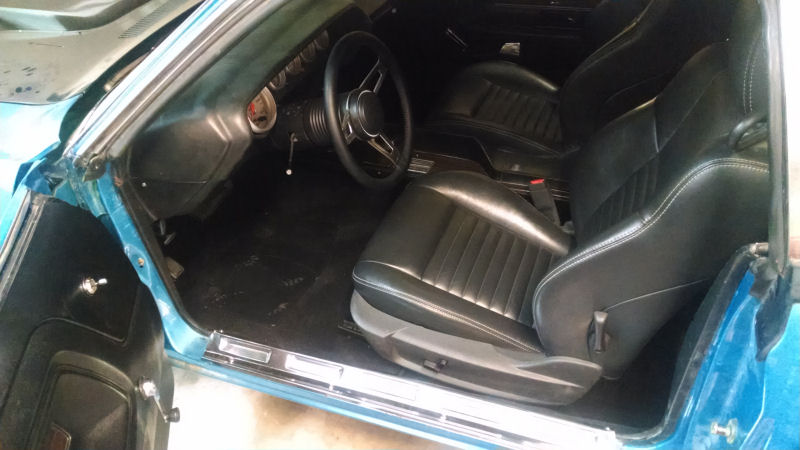
My son found a smokin' deal on some seats out of a 2009 Challenger and picked them up. We had to cut the humps out of the new floor pans and refloored them with new braces and some strong metal in order to get the new seats to sit down flat and low enuf to be able to crawl under the steering wheel. That leather feels really good and I like electric seats to boot! This picture is a mock up before welding was finished.

Look good, feel good, is good! I don't think the rears are going to work. They are fold down (the new ones) and the head rests stick up too far and block rear vision. the seats are much larger than a lot of the aftermarket "racing" seats and I don't think they will work well for anyone over six ft which is my height.
Remember I said the front of the top was rusted out and bondo filled? One day, it will have to have a new skin, but, I decided to pull the vinyl top off and patch up. Unfortunately, the car is not light silver blue metallic, nor is it the bright poly blue metallic that I bought the second time to put on the top...oh, well, two tone is in and my paint budget over runs made me think I was married again.
Painted the rear spoiler, but, for some reason I did
not paint the tail panel. Again, the satin did not look like
satin to me. Wonder what happened to the E? It was on
there in the second picture. Got a freebie coming. Oh, I found it in
a box...
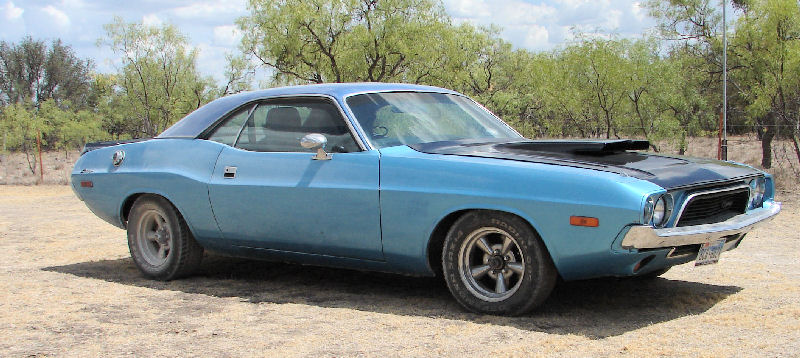
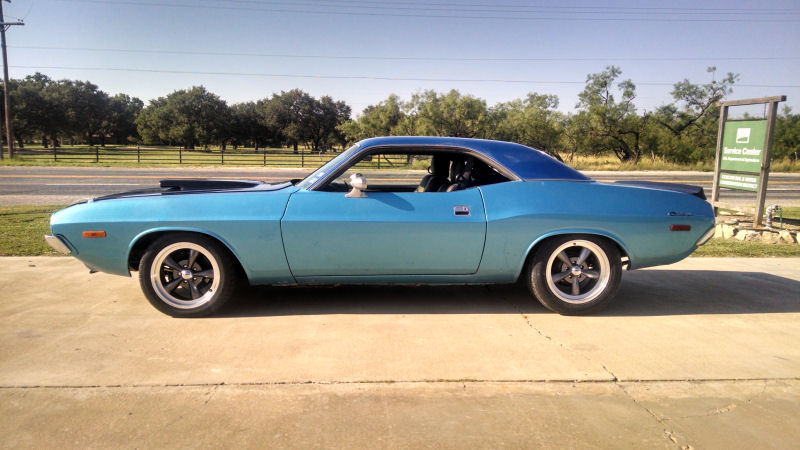
Took the stripes off as well. The Hotchkis kit dropped the rear about two inches from where it originally was sitting, and after installing the new torsion bars which have twice the spring rate as the old, I set the front for a slight rake as well. The recalibrated Bilsteins feel like they will work well also. Still have to install the front and rear sway bars.
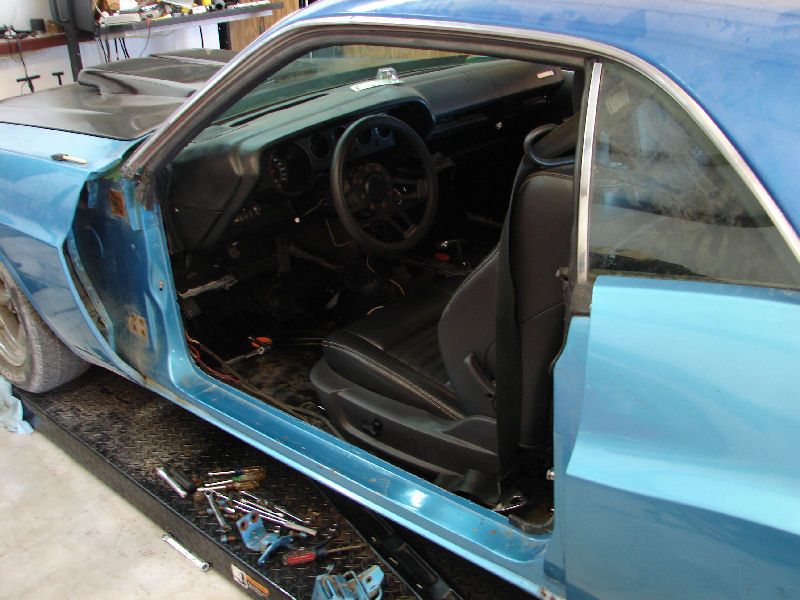
This is my new open door policy. Hinges on this side died and the door dropped down. I just rebuilt them and bolted the door back on, but, I am still a bit off on the adjustment.
Got new carpets to do once I finish the wiring for the seat. Power works, but, I have to figure out the wiring for the led lights in the seat back. Then wheels, tires, and who knows what else. Some money pits never get enough and this is one of them. Oh, yeah, I bought a panel full of Autometer gauges to build a new dash from. Running out of the headers melted the speedometer cable and so it goes. Bought a new cable that works with the Autometer speedometer and melted it too! Got another one on the way. This time I will pay attention to the routing.
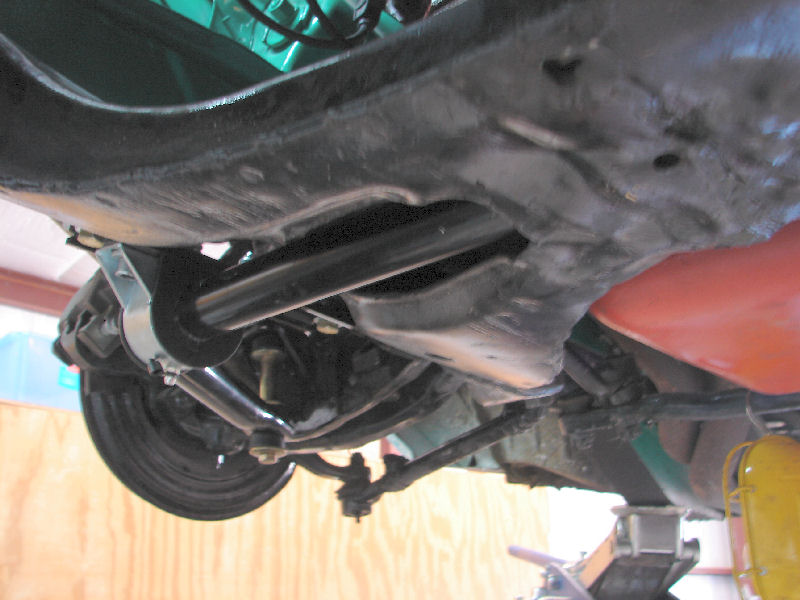
Here is the Hotchkis front sway bar installed. Instructions say it is 220% stiffer than the optional factory bar. This car had no sway bars so I don't know how t calculate that roll stiffness, but, combined with the new torsion bars that were 230% stiffer than the bars that were on the car, this thing should resemble a go kart if it does not rip the bottom out from under the car.
Still have to do some welding to install the rear bar.
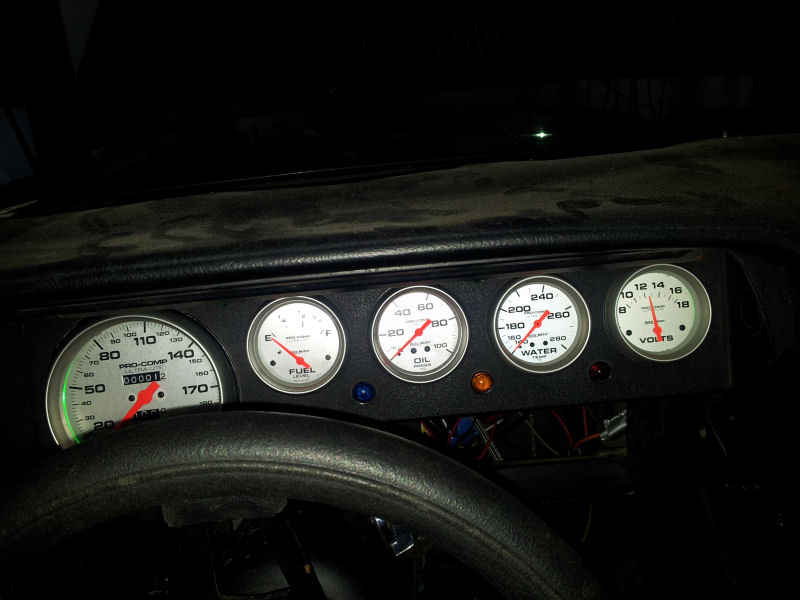
Most of the instruments in the factory dash did not work due to the fire behind the ammeter and perhaps old age so I set out to build a new cluster using Autometer gauges-some of which I found on Ebay. I used mechanical gauges for the oil pressure and water temp. I used l.e.d.'s for the turn signals and warning lights plus in the gauges for lighting. In the end, I have eliminated much of the factory under dash wiring and ran a new wire from the ignition through the firewall thus bypassing the bulkhead connector which is not in the best condition and which was undersized from the factory-particularly with regard to the wiring going to the ammeter and the "start/run" wiring. Using the HEI ignition, I don't need the ballast resistor which is a weak point in these cars and has been since the day they left the factory in my opinion. As this is nowhere close to being a rare car, I don't feel any need to make it just like it was when it was built. I would rather use recent technology for a better driving experience. I guess that makes me a restomodder?
After installing the gauges and crawling behind the wheel, I noticed the Grant steering wheel that was in the car now blocks the gauges. The view was not good before I installed the seats which are about an inch taller than factory after all is said and done. When I got the car, there was no crush can on the column and the steering wheel was up against the dash. I installed an extension from Grant which brought the wheel out a couple of inches. The view of the dash was not the best before the install but I can either lean way back in the seat which I am too old to think is cool or I can do something else. At the moment, I have installed a factory crush can which is much longer and am waiting on a leather wrapped Tuff Wheel clone which is a bit larger in diameter than the Grant wheel. I hope that helps the situation.
One way, or another, the car now starts easily and I have a much higher degree of satisfaction than I did in the past.
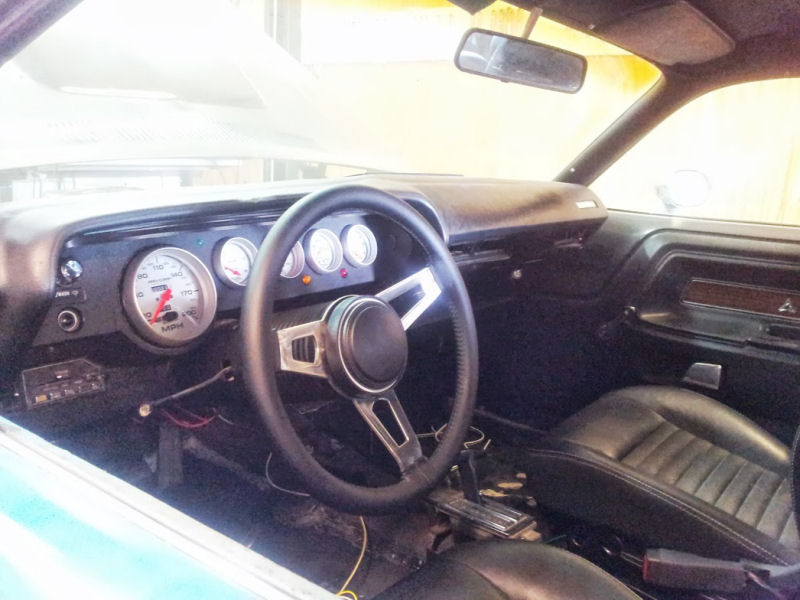
Pulled off the old Grant wheel, and I installed the factory crush can and a reproduction, leather wrapped Mopar Tuff Wheel. These were never installed on E Bodies but, I like them. Still have not figured out to see the speedometer. I thought the can and wheel might give me a path to the speedometer but, I can see it at 140 mph. I need to be a couple of inches shorter and the seats need to be sunk into the floor an inch, I think. Don't hold your breath.
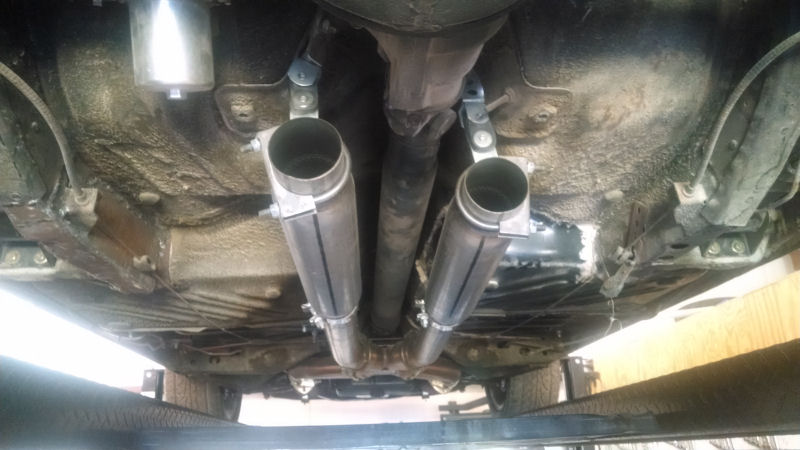
Temporary exhaust using 3" Walker RaceBullets...bit noisy but the clearance is not too bad. Passenger side header is lower than the driver's side. Makes that side lower than it should be. Not sure if that is the engine tilted that way or it is the no name headers. Tail pipes would sure help the noise under the car.
New ACC carpets with mass deadening on the back.
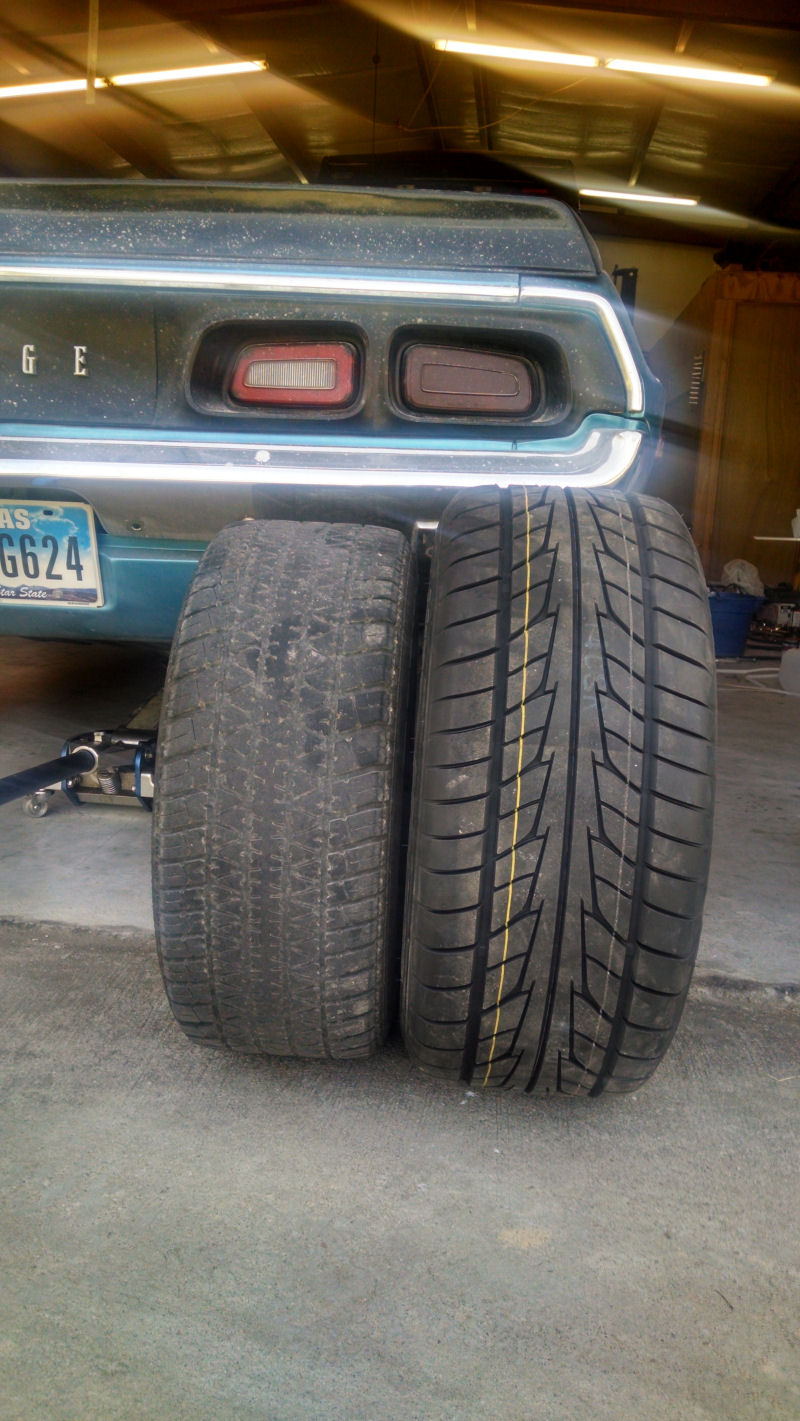
Nitto 555 Extremes for the rear.
Summit Racing Legend wheels with Nitto Extreme tires. Fronts are 17x8 with 4.5" back spacing. Tires are 245/45-17. On the rear, the wheels are 17x9 with 5.0 back spacing. The tires are 255x50-17. I went with the 255's because I wanted a 27" tire to get the car up a little. 25.4" tires would drop it about 3/4" and it would be very close to not clearing my lift when I drove on. The 255's are only marginally more narrow than the 275's. I am happy with the look. I am building for a road car that handles well more than a strip car. The larger diameter tire and the larger 50 aspect will hook better than a shorter, slightly wider tire anyway.
I am beginning to like this car.
I now have a 526 c.i. stroker engine to stick into the car as soon as I clean my shop up. It's a very mild build with 528 hp and 629 ft-lbs of torque so it should make a reliable driver with lots of low rpm pull. I also have a John Cope built tranny to go behind it and Doug's headers to help it breath as well as it can.
I aso have a set of new rotors from the big cars and some EBC pads to go with them. I took the winter off (if you can believe Texas actually has winter) so the parts have stacked up. Time to convince myself to start working on cars again!
Okay, took me about 8 months to convince myself to start working. Middle of August is not the best choice.
Pulled out the old engine and transmission.
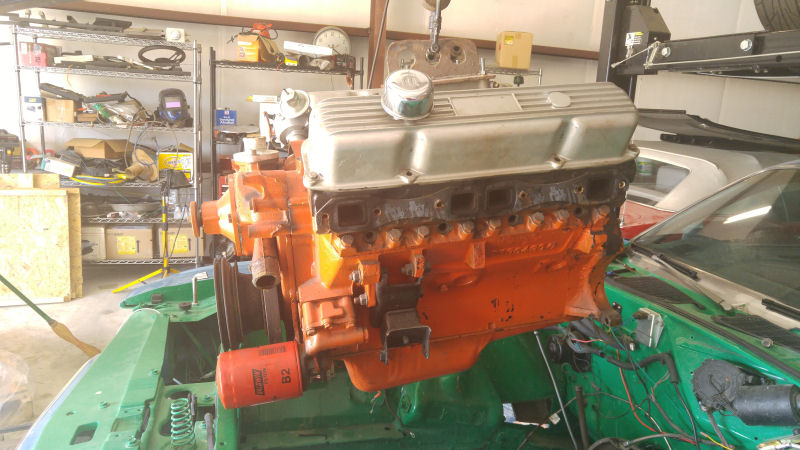
Drop the new engine , headers, and transmission in.
Getting the headers and starter in was a bit of a challenge but nothing is touching. I hope it works because the starter install is no fun.
Now, I have to do the hard part which is figuring out how the linkage, accessories, etc. all go back in.
Here is a video clip on a part throttle run. It is really twitchy up in first if you get very far in the gas. Something else to sort out.